
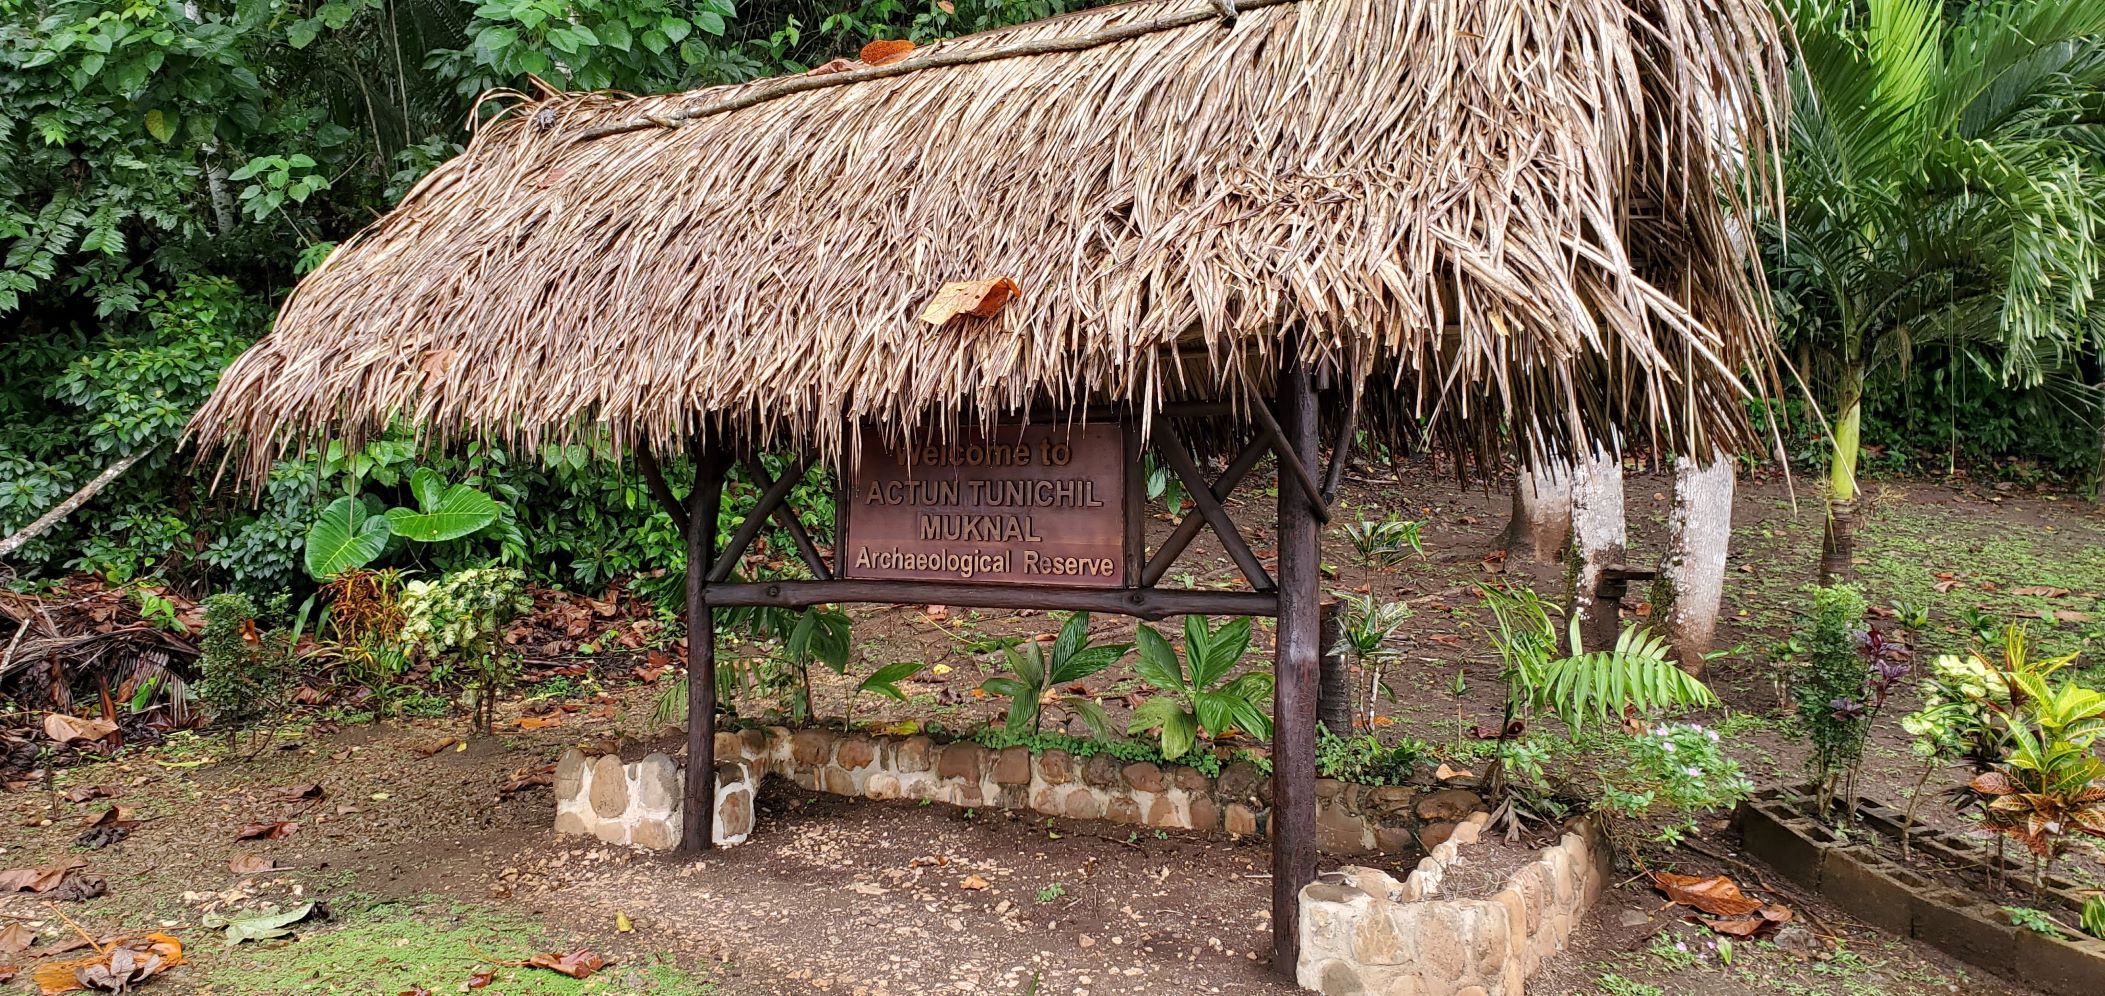
One of the highlights of our trip to Belize was exploring Actun Tunichil Muknal, the Maya archaeological site known locally as ATM.
While there were many different cave excursions available throughout the Cayo District, the ATM tour was situated in the ‘extreme adventure’ category in our hotel’s caving options and there was no question this was the one we wanted to experience!
I did more research and planning for this specific activity than for our trip overall, wanting to make sure we had the right gear and expectations. Based on our experience, I’ve outlined some tips for how to get to ATM, what to expect, and – maybe most important – what to wear.
Important note: Most of the photos below were shared with us by Hugh, our guide – noted in the captions. You are NOT allowed to take cell phones, cameras, go-pros, etc. on this tour because of prior instances of people dropping these items on the artifacts (detailed extensively online).
Unfortunately, because of people trying to skirt the rules, you’re no longer allowed to take these items anywhere on the tour – including the hike out and back to the cave. The Belizean government only allows tours to the cave to continue on the guarantee these rules will be followed – the guides can lose their licenses if someone on their tour is caught.
So prepare to be in the moment for the duration of your experience, and cross your fingers you have an amazing guide like Hugh who is willing to share his photos from long ago/ before this rule went into place!
What is ATM?
Actun Tunichil Muknal cave, otherwise known as the Cave of the Stone Sepulcher, was first entered by the Mayas in AD 300-600. It was not until the late AD 700-900 that the Mayas went deeper into the cave to perform their ceremonies. The cave was officially opened to the public in 1998. The cave houses various types of artifacts from ceramics and stoneware to the remains of skeletons. The Mayas consider Actun Tunichil Muknal a highly sacred location.
https://belize.com/actun-tunichil-muknal/
Today, ATM offers visitors a little bit of everything – hiking through the jungle, swimming across rivers, climbing around the cave, navigating by headlamp, learning about the Mayas and their rituals, and more. We spent about 3 hours inside the cave and 5-6 hours on this tour overall, making for an incredible, all-day adventure.
How to get to the ATM Tour
You must have a licensed guide in order to go on the ATM tour. According to our guide, only 25 individuals have these licenses, which were offered through a one-time program by the government. They had to go through extensive training in archaeology and Maya history and culture, and they are expert at navigating the cave and successfully helping visitors through their experience.
Nearly all hotels in the Cayo District are able to help guests make arrangements for a tour, and I also saw several options via GetYourGuide and Belizing.com. It was easiest for us to make arrangements through Mahogany Hall, where we were staying, which included pick up and drop off. Our guide, Hugh, picked four of us up for the 40-minute drive to the site, and shared all kinds of history and local geographical information with us along the way.
After turning off the main road, we headed through beautiful countryside back into the jungle before arriving at the entrance to the site. Hugh had to complete paperwork with the rangers while we waited in the vehicle, and then we were parked among all of the other tour vans and able to access the facilities (well maintained with flush toilets and camp showers).
Each tour guide outfitted their group with helmets and headlamps, everyone was offered a life vest, and then each group set off for the 45-minute hike through the jungle to the cave entrance.


What to expect during the ATM Tour
The 45-minute hike to the cave entrance takes place on a wide, shaded, dirt trail that follows the river. The trail is muddy in places, especially after it rains, and almost entirely flat. While there’s very little gain to contend with, you should be prepared to watch your step as the trail is intersected by lots of exposed tree roots and rocks (photo below).
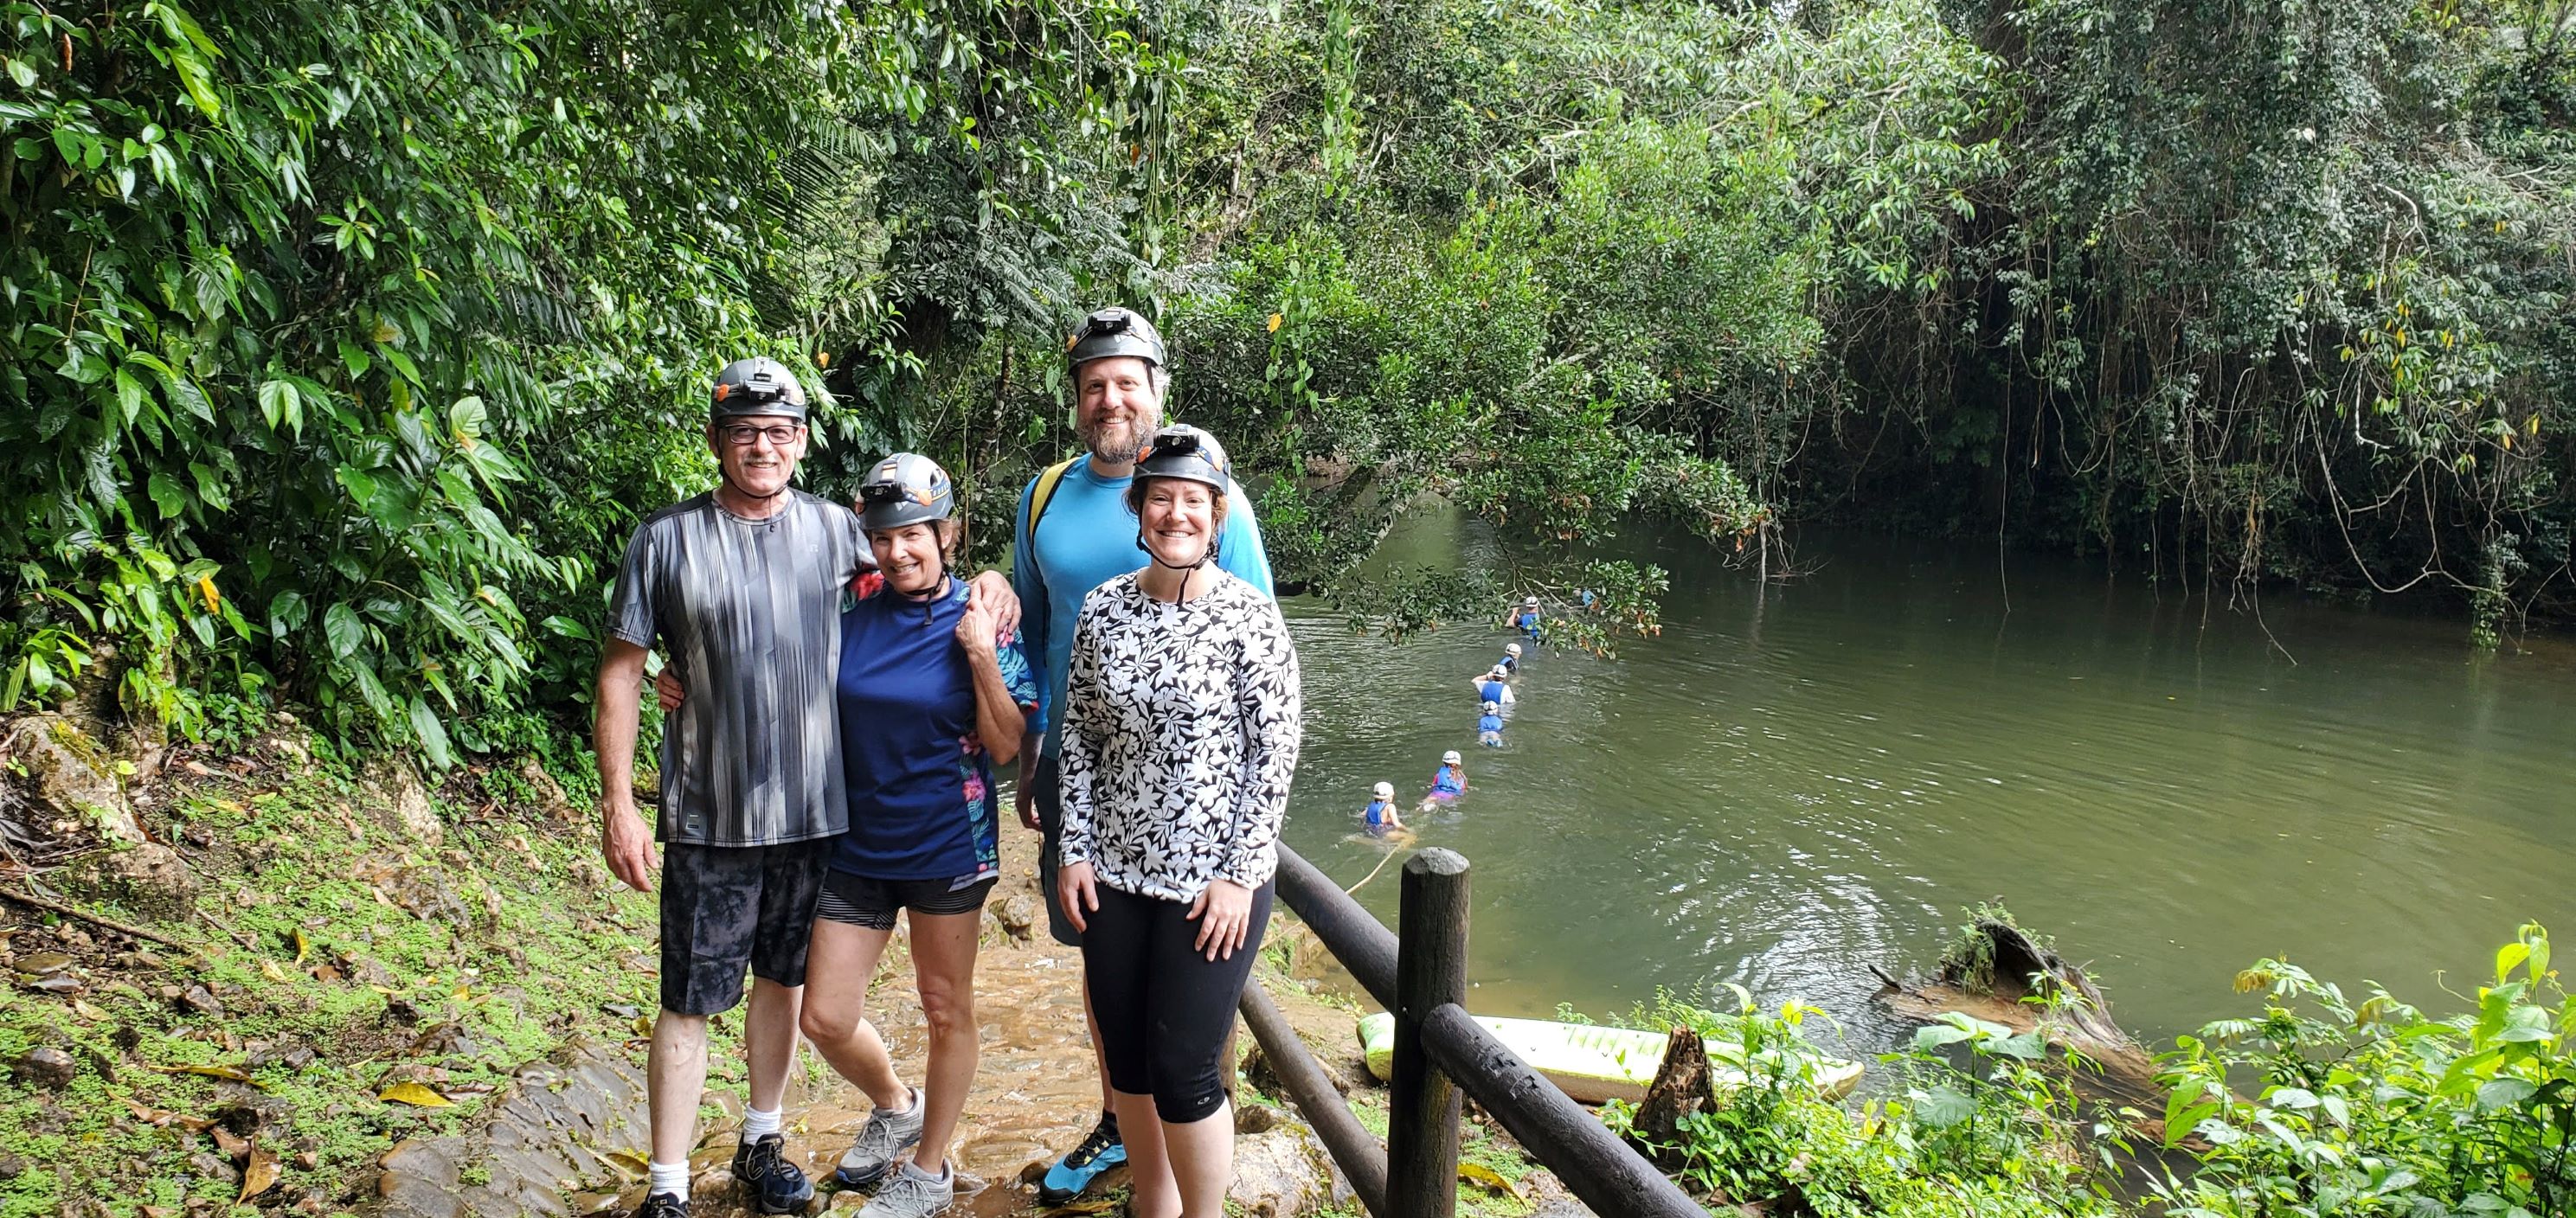
However, before you even begin the hike, you’ll encounter the first of three river crossings – and this first one is neck-deep. Hugh took our picture before we set off (below) and you can see the group ahead of us fording the river with the help of a rope that’s strung across. This river is only steps from the parking lot so many people came and took pictures here before leaving everything in the locked vans for the tour.
The other two river crossings are mid-shin / waist deep, although all of this depends on the amount of rain and depth of the rivers. Hugh warned us on the drive there that tours have been cancelled due to rain because the water not only rises in the rivers, but in the cave itself, making it unsafe to enter.

During the hike, Hugh pointed out huge termite nests up in the trees and flora along the trail, but the highlight was being stopped in our tracks by a terrifyingly loud growling sound that seemed to be coming from the river! Everyone’s mouths fell open and we collectively yelled, “what was that!?” Hugh laughed and told us it was the howler monkeys! I knew there were howler monkeys but I had no idea what they sounded like. This video gives you the sense of how they sound but doesn’t do justice to how LOUD they are!
Just before we arrived at the cave entrance we came to a shaded clearing where there was a small building and covered picnic-type area. Everyone was encouraged to wander into the woods – ladies to the left and gentlemen to the right of the trail – for a last pitstop before we entered the cave for the next 3 hours.
You enter and exit the cave from the same point, featured in Hugh’s photos looking in and out below. You do this by climbing over slippery rocks into the water, and swimming about 30 feet into the cave where you can finally touch. You are in water that varies from shin-deep to neck-deep (for me, I’m 5’4″) for the vast majority of your time in the cave. I don’t want to spoil all of the surprises, but suffice it to say you will be climbing on, over, and around rocks, swimming and wading, squeezing through small spaces and following your guide through big caverns.
You’ll also be encountering artifacts and skeletons that are unnervingly close at hand – I think Brian and I were both shocked at how close we were and unsurprised that other people had dropped things on them as a result. Hugh was an exceptional guide and shared a wealth of information with us throughout our time in the cave.
After our time in the cave we set off at a brisk pace for the vans. The river crossings seemed colder on the way back and just as soon as I started to dry off, we entered another one. Brian reminded me I was going to be neck deep at the last one so it didn’t really matter! At the parking area, we grabbed our towels and spare clothes from the vans, hit the camp showers to rinse off, and then sat down to an amazing lunch of stew chicken, rice-and-beans, and plantains. YUM.


What to wear and take on the ATM Tour
I read over multiple packing lists ahead of our tour but couldn’t quite get my mind around what we were allowed to take and wear, what we needed to leave in the car, what we could carry to the cave entrance, etc. Here are my recommendations:
What to wear
- A bathing suit. You’ll be in the water the majority of the time. I wore a two-piece under a rash guard and quick-drying yoga pants, and Brian wore his bathing suit as his pants with a rash guard as a shirt.
- A rash guard or some other long-sleeved shirt. This is for multiple reasons: You will get scraped up climbing over and around rocks during the river crossings and in the cave. You will be wet the entire time and while the water wasn’t super cold, it wasn’t exactly warm. And finally, you need to be appropriately covered given the sacred nature of the cave and the rituals performed there (Hugh made two girls in our group wear life vests the entire tour because they had only brought bikini tops and shorts.)
- Board shorts or quick-drying pants. The pants situation was easier for the guys who wore their bathing suit as their pants. I considered getting board shorts myself but ended up wearing quick-drying, shin-length yoga pants over my bathing suit bottom, which worked just as well. In either case, much like the rash guard, this item will help protect you from scrapes, and keep you warm and appropriately modest.
- Close-toed water shoes. Probably the hardest item to land on was what shoes to wear – you need something comfortable for hiking, and you need something that can be immersed in water for hours. Brian found us these Xero Aqua X Sport water shoes and they were PERFECT. They have great traction for the slippery river rocks, are exceedingly comfortable for hiking, and have enough substance to keep our feet protected. There were a couple of people in our group who had slip-on sandals and they were really struggling on the hike and river crossings. Hugh only allowed them because they could float, which was handy when they fell off in the water.
- Socks. At the final section of the cave, you have to switch out of your shoes and into socks. This is to protect both you and the environment you’re going to be walking on. Socks are not optional – you can either wear them the entire time under your water shoes/sandals or you can hand carry them into the cave and change into them. Remember you’re going to be fording three rivers and swimming several times by the time you get to the point where you need to change into them – meaning, they will likely be wet. We took Hugh’s recommendation and just wore them for the duration of the experience.
- [Optional] Sunscreen and bug repellent. We wore both, but I’m not sure we needed either. We were under tree-cover the duration of the hike and under a covered patio when we ate lunch, and we didn’t encounter any bugs in March. If like me you burn easily and get eaten alive, you might still opt to wear both, but consider products that will stay on through all of the water activities and that won’t harm the environment if they do wash off.
What to take on the hike to the cave entrance
- A refillable water bottle. You are allowed to carry a water bottle to the cave entrance, at which point you have to leave it near a tree or rock where everyone’s taking a pit stop. I highly recommend taking water – you will want it on the hike in both directions, but especially when you come out of the cave and before you hike back to the parking area. I’d recommend a refillable/reusable bottle (Hugh had water to refill us at the end of the tour) AND something that seals well. Remember, you’re going to be holding it in your hand while you use a rope to pull yourself across that first river crossing!
- Trail snacks. Despite our big breakfast at 7 a.m., we were pretty hungry by the time we exited the cave at 2:30 p.m. We had a couple of granola bars and other people had trail mix and dried fruit for a quick pick-me-up before the 45-minute hike back to the vans for an actual lunch. Like the water bottle, you’ll be leaving these items at the cave entrance and picking them up before you hike back out. Hugh offered to carry these items for people in his water-proof bag. Which leads me to the last item.
- [Optional] Water-proof backpack. If you don’t want to hand carry your water and snacks, you can consider taking a small waterproof backpack or bag for those items. Brian purchased this one and it worked perfectly (I may or may not have volunteered him to carry water for other people in our group who didn’t plan ahead and bring a bag – just trying to be friendly!). As with the water bottle and snacks, you’ll be leaving this at the cave entrance – you cannot take it inside. Brian hung ours up in a tree and we had no trouble grabbing it on the way out.
What to take to the parking lot (and leave in your vehicle)
- A towel. The last thing you do before returning to the vehicles is cross the neck-deep river – you will absolutely be wet in the parking lot! You’ll want to have a towel to take with you to the camp showers where you can step inside, rinse off, towel off, and change into dry clothes.
- A change of clothes. We didn’t take different shoes since our water shoes dry pretty quickly, but we did take everything else to change into after rinsing off in the shower, including ball hats for our crazy-looking hair. You’re just rinsing off in the camp showers – not actually getting super clean – so keep that in mind when you think about what you’re going to change into for the drive back to your hotel.
- A bag for your wet clothes. A few people attempted to lay out their things to dry while they were eating lunch, but I doubt it had much impact because we weren’t there long. Bring a bag that you can use for your wet towel and clothes, keeping in mind that your clothes may also be a little dirty.
- A tip for your guide. We agonized a bit over what ID and money we should or should not bring along. As it turned out, there are multiple tour groups and vehicles there at the same time, the vehicles are all locked, some of the drivers remain with the vehicles, and you can feel confident leaving a few personal items in the car/van. I think we were right to be judicious in only bringing the bare minimum of what we needed, and that included tip money for Hugh, who was an incredible guide.
We absolutely loved our ATM tour experience, and I highly recommend it if you’re planning to be in the Cayo District of Belize! If you have questions about any of this information or other aspects of the experience, please let me a note in the comments!

Pingback: One Week in Belize Itinerary – Heather's Compass
Pingback: Exploring San Ignacio, Belize – Heather's Compass